How to set up ads tracking with FatAds and CPV Lab
Looking for a convenient walkthrough for setting up S2S postback at CPV Lab?
Here’s a detailed guide on how to set up ads tracking at CPV Lab by FatAds ad network!
How to setup ads tracking at CPV Lab: a detailed guide by FatAds
Here, we listed the main points of postback integration process at CPV Lab ad tracker:
- Connecting FatAds as traffic source at CPV Lab.
In this part we will show how to add advertising networks like FatAds at CPV Lab tracker for data collection on traffic sources. - Connecting an offer source with CPV Lab.
In order to get up-to-date insights on conversions the CPA-networks gather, we will show how to add an affiliate network to CPV Lab. - Setting up conversion tracking for the offer at CPV Lab.
By connecting the exact offer to CPV Lab it will ensure the accurate data collection and attribution. - Starting an ads tracking campaign at CPV Lab.
We will also show how to unify all the connected sources into a single conversion tracking campaign at CPV Lab.
Stage 1
How to connect an advertising network to CPV Lab
As a first step, you need to add the add network to the CPV Lab tracker as a traffic source. Since many advertising platforms, for example, FatAds, are already integrated into CPV Lab, you just need to connect them by selecting an already-made traffic source template, like this:
- Add a new traffic source at CPV Lab.
Proceed to the ‘Traffic Sources’ tab, then click the ‘Import From Catalog’ button.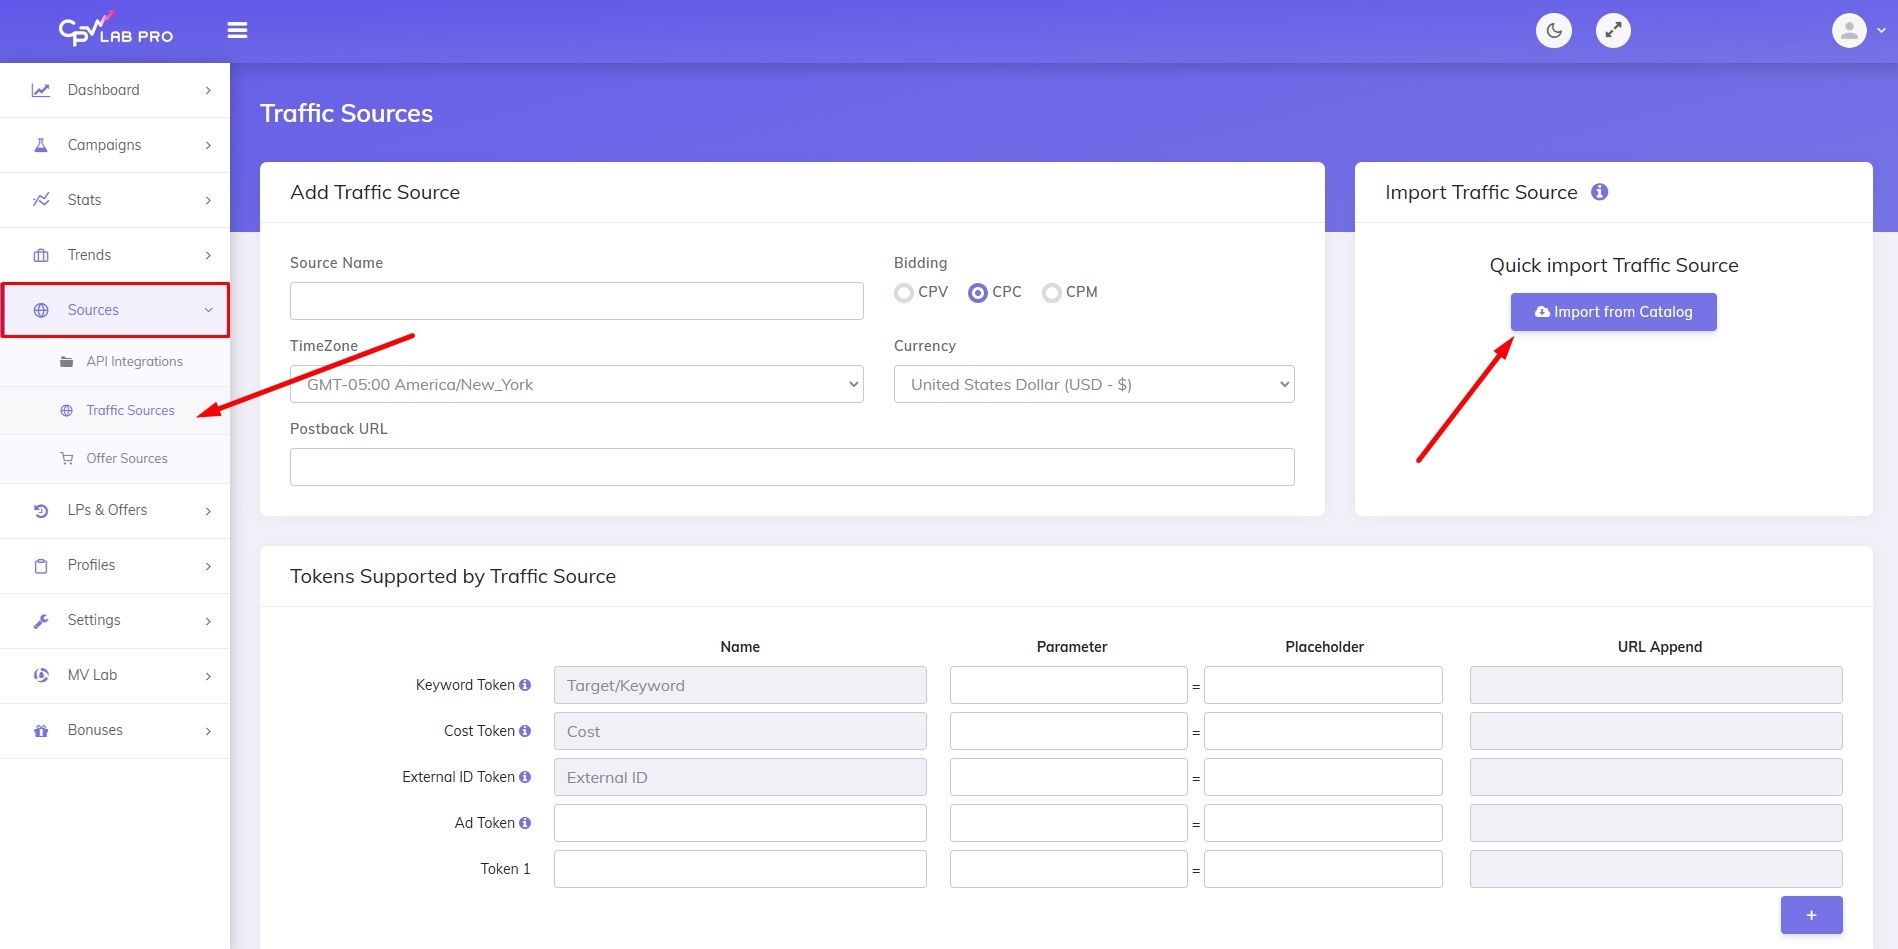
- Choose the needed template.
Start typing the name of the advertising network, then click the item.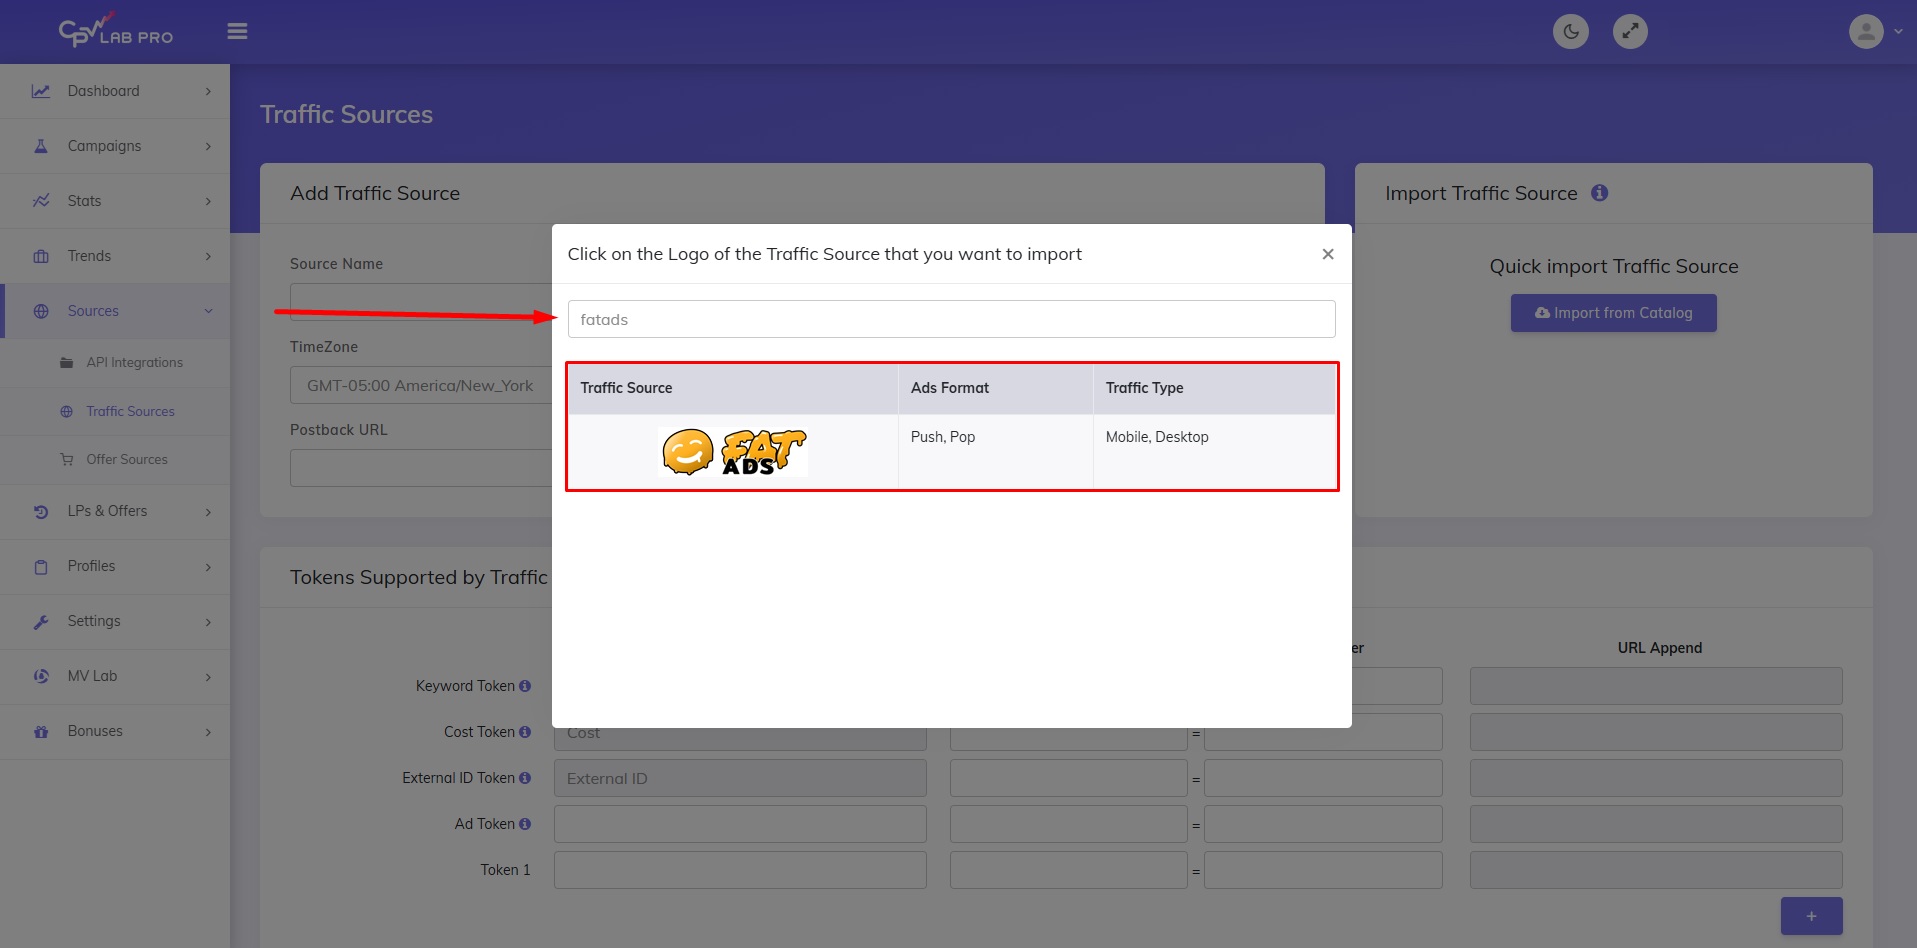
- Save the added advertising network.
Scroll down the page and press the ‘Save’ button to complete adding FatAds as a traffic source.
We have just added FatAds as a traffic source at CPV Lab, that’s it? Yes, but then we need to add an affiliate network!
Stage 2
How to add a CPA-network to CPV Lab
CPV Lab tracker is integrated with a variety of affiliate networks that you also can connect by adding their pre-made template. We will walk through this step by the example of adding TerraLeads:
- Add a new CPA-network to CPV Lab.
Go to the ‘Offer Sources’ tab, then click the ‘Import From Catalog’ button.
- Choose the offer source template.
Start typing the name of the affiliate network, then click on the needed item below to select.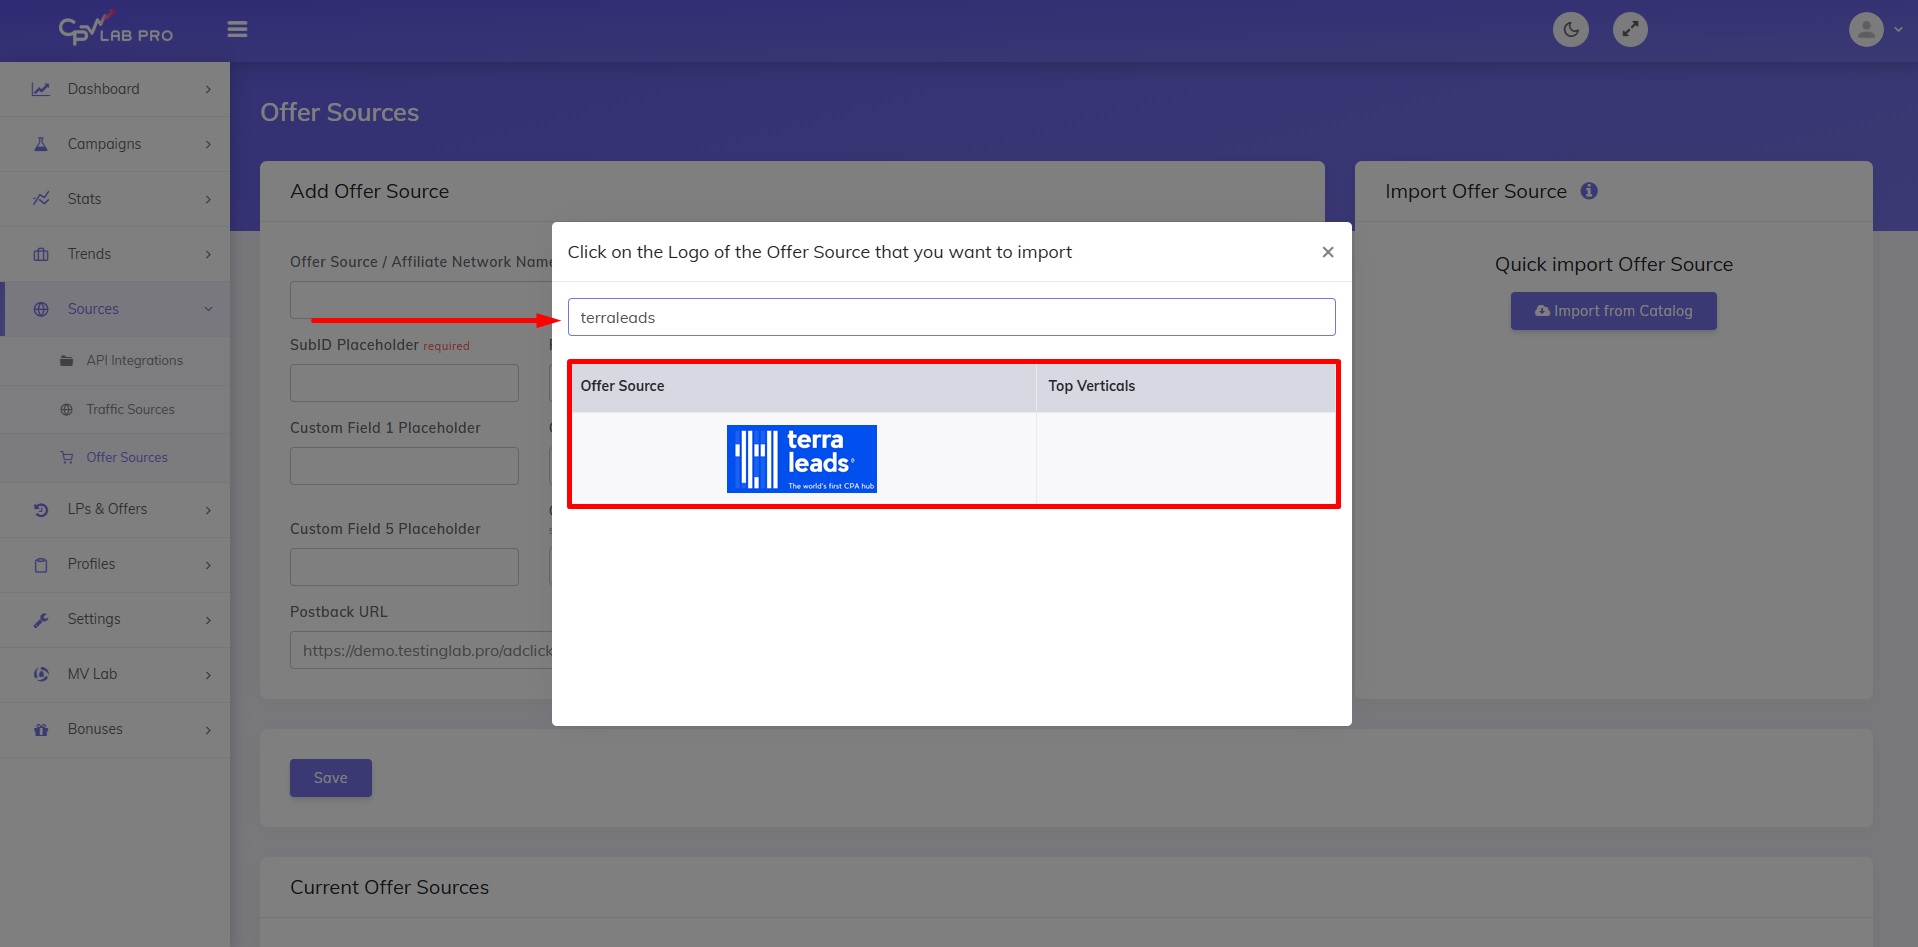
- Copy the postback URL and save changes.
On this page you need to copy the ‘Postback URL’ field and save it. Then, click the ‘Save’ button to complete adding the affiliate network.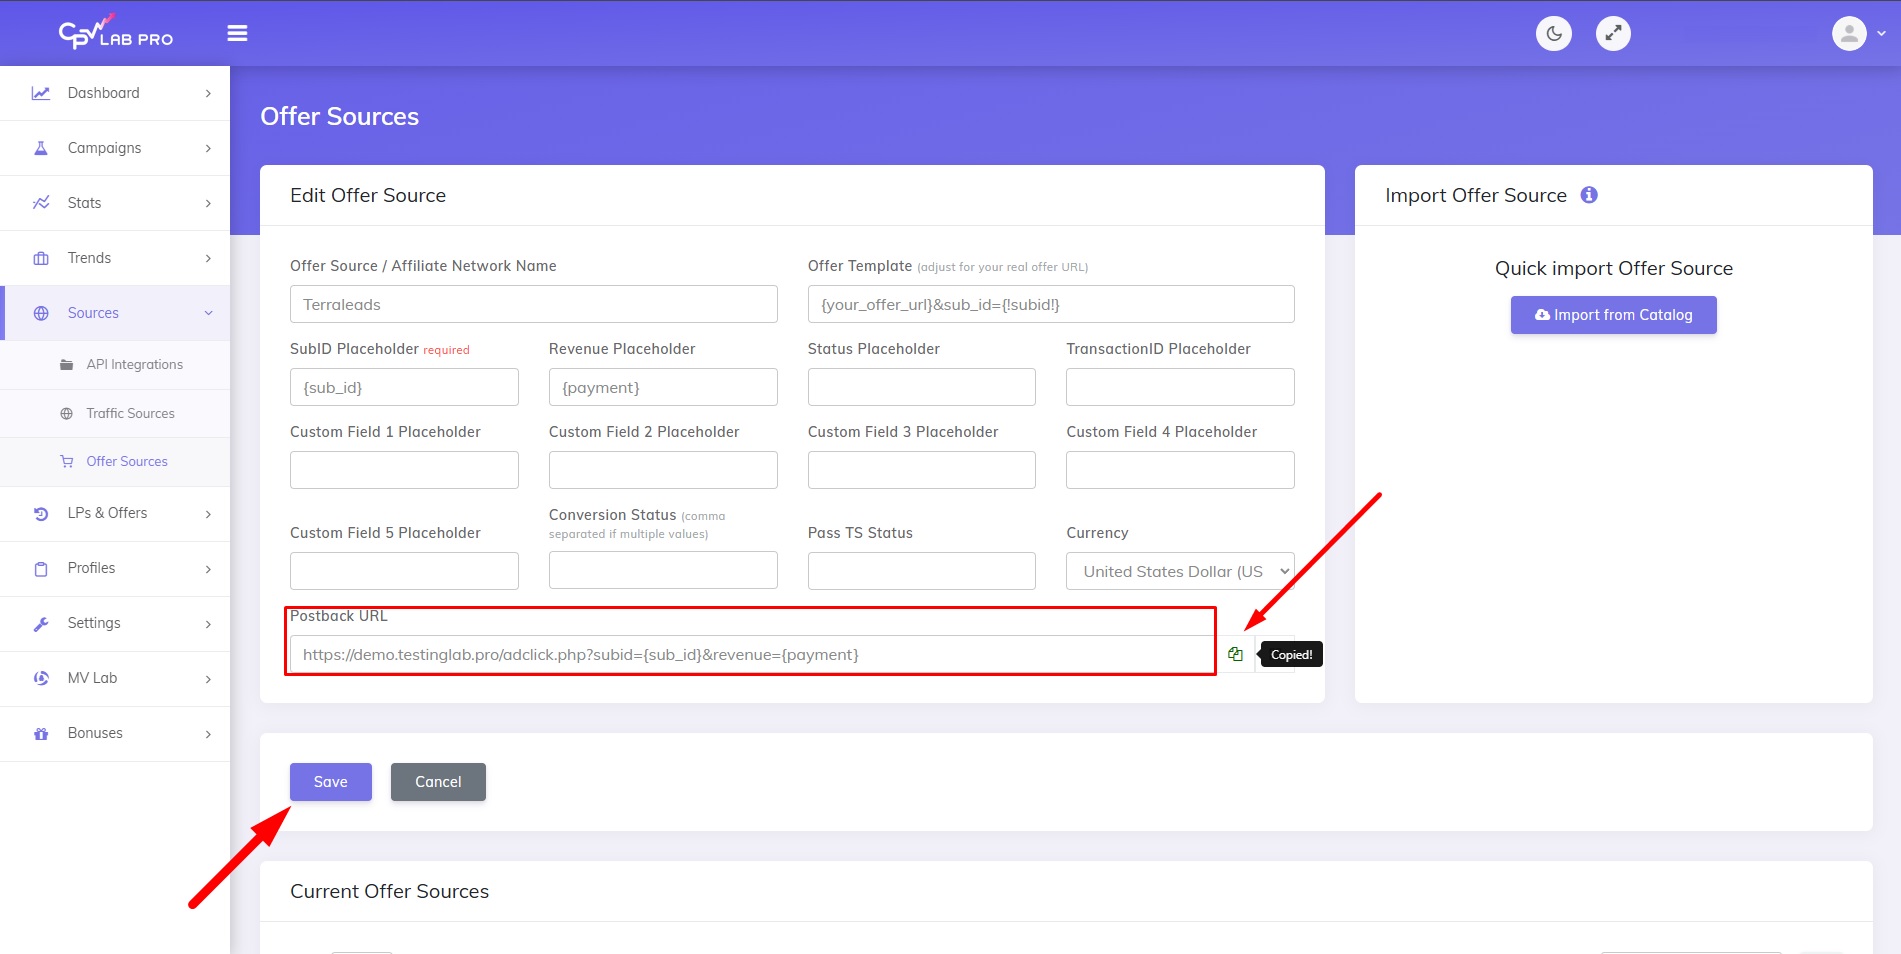
Well, an affiliate network is successfully connected to the CPV Lab tracker, now what? After that, we need to add a CPA-offer to the tracker for accurate conversion data collection.
Stage 3
How to set up a CPA-offer conversion tracking at CPV Lab
For this part we used the offer we got from TerraLeads affiliate network, so the process of setting up tracking for offers in your CPA-network might differ. If any challenges occur at this point, connect the tracker’s support team for assistance. In our case, connecting a CPA-offer to the CPV Lab tracker goes like this:
- Choose the offer in the CPA network.
For example, in TerraLeads you need to find the ‘Offers’ tab, choose the offer and click the ‘Create stream’ button right next to it.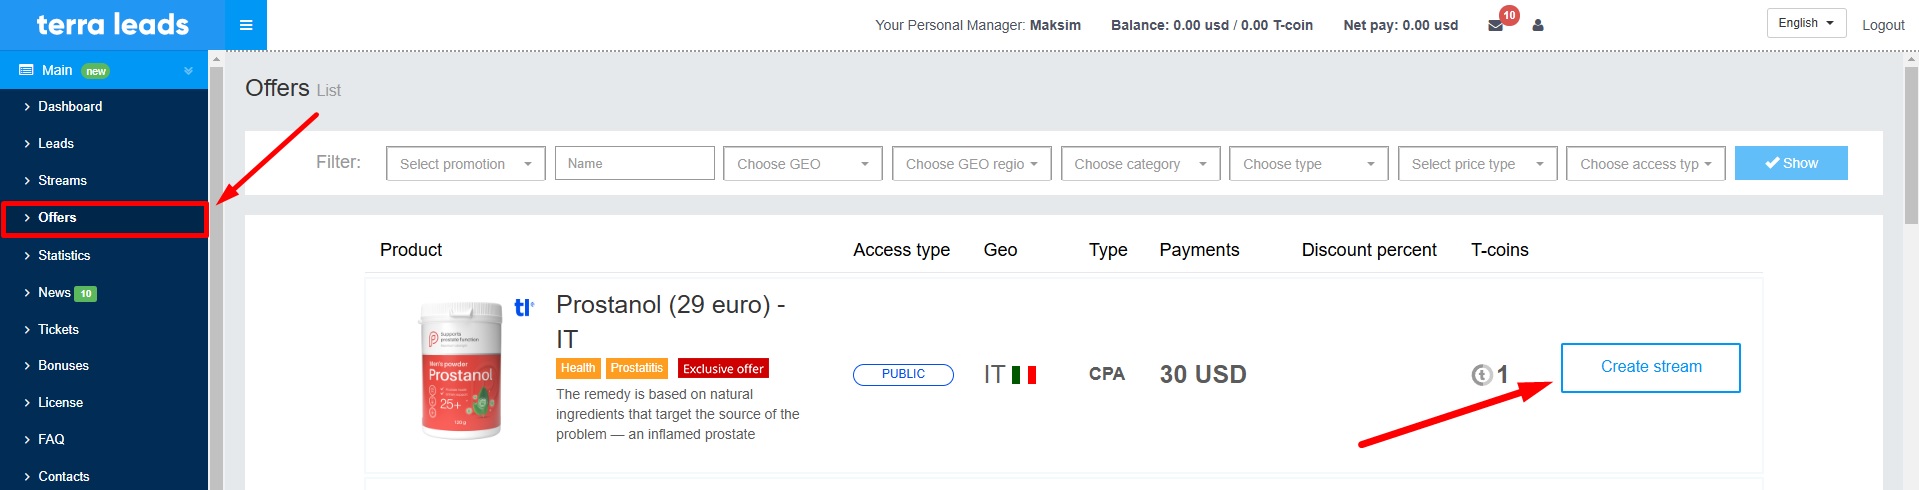
- Specify the offer’s tracking details and insert the postback URL.
On this page you can name the stream, select the traffic source and geo. Then, you need to insert the earlier copied ‘Postback URL’ into the field ‘URL Postback’, then specify parameters to ‘Postback Type’ (we recommend selecting ‘POST’) and statuses to track. Below, you would find landing pages templates to set up.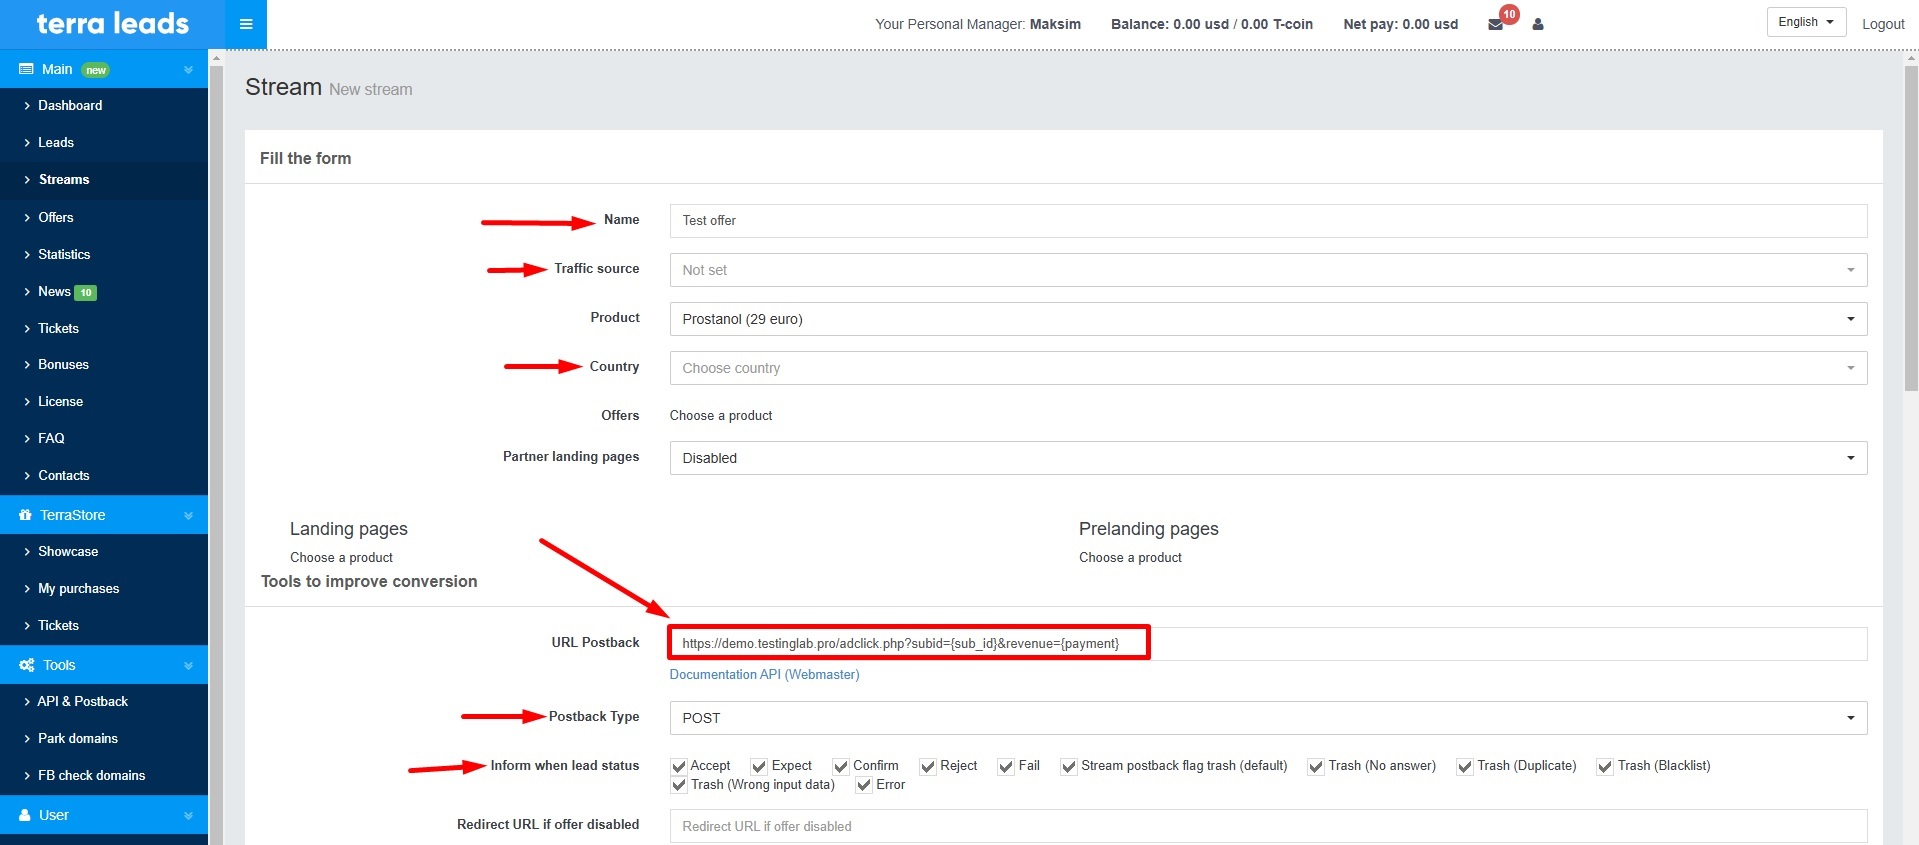
- Save the tracking stream.
Scroll down the page, then click the ‘Save and Continue’ button.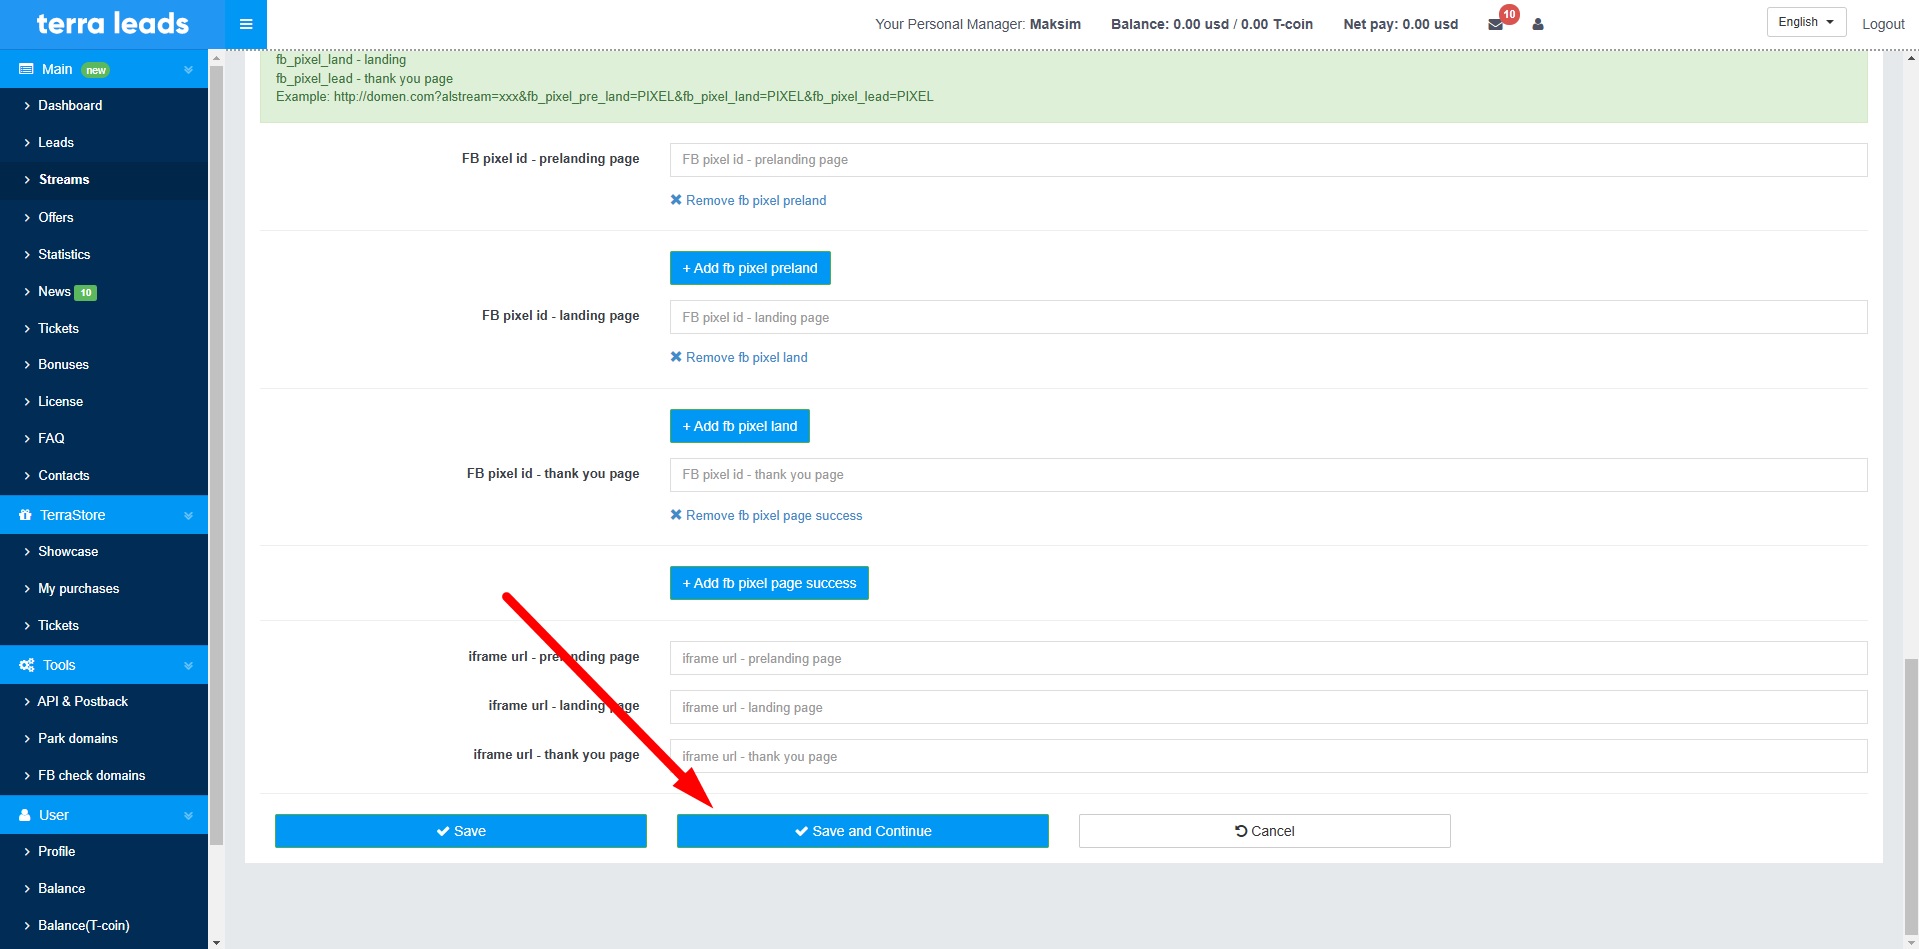
- Copy the tracking link.
Proceed to the ‘Streams’ tab at TerraLeads, then copy and save the ‘Tracker URL’ of the offer.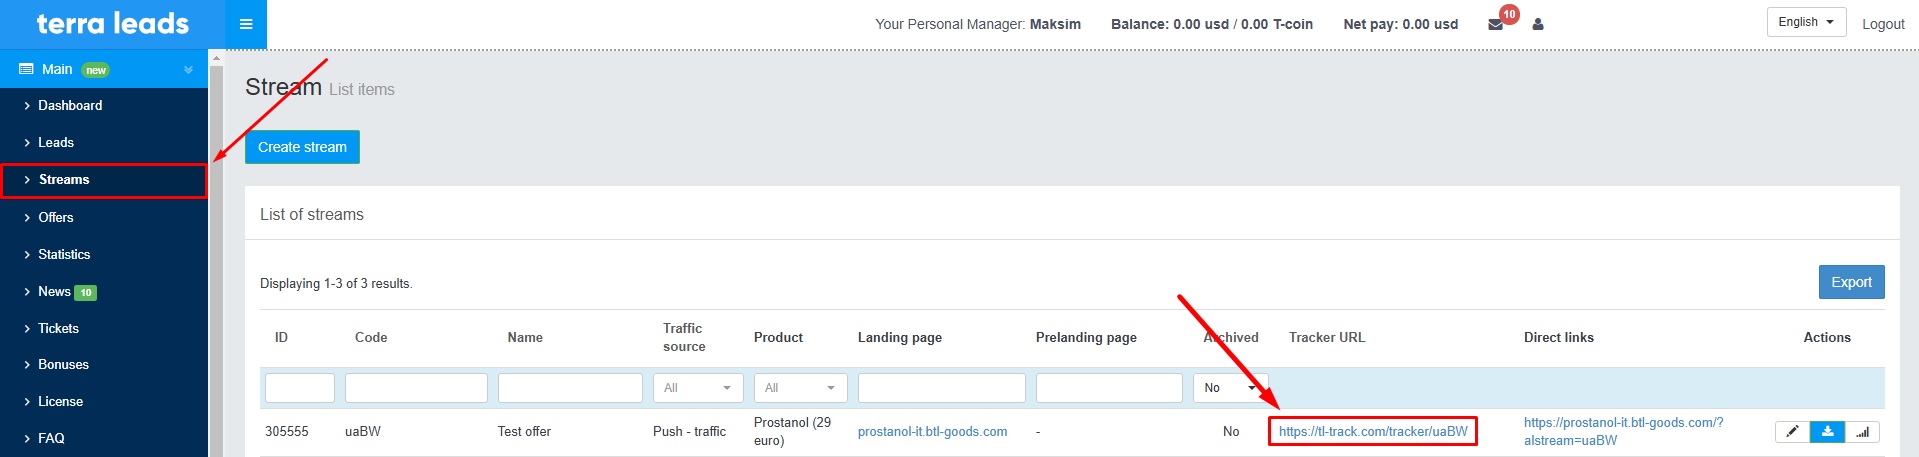
- Add a new offer at CPV Lab tracker.
Proceed to the ‘Offer Management’ tab at CPV Lab, then specify the offer’s name, affiliate network; paste the earlier copied ‘Tracker URL’ into the ‘URL’ field, also set ‘sub_id’ token.
After that, click the ‘Save’ button to complete adding an offer at CPV Lab Pro.
Now we’ve added all the required sources for ads tracking at CPV Lab, then what?
Stage 4
How to create a conversion tracking campaign at CPV Lab
Now it’s time to unify all the connected sources into an ads tracking campaign at CPV Lab for streamlined data collection. For an accurate campaign setup at CPV Lab:
- Add a new tracking campaign at CPV Lab.
Proceed to the ‘Add New Campaign’ tab at CPV Lab tracker, then click the ‘Create campaign’ button for the needed option (we recommend selecting Direct Link & Landing Pages). Then click the ‘Advanced setup’ button.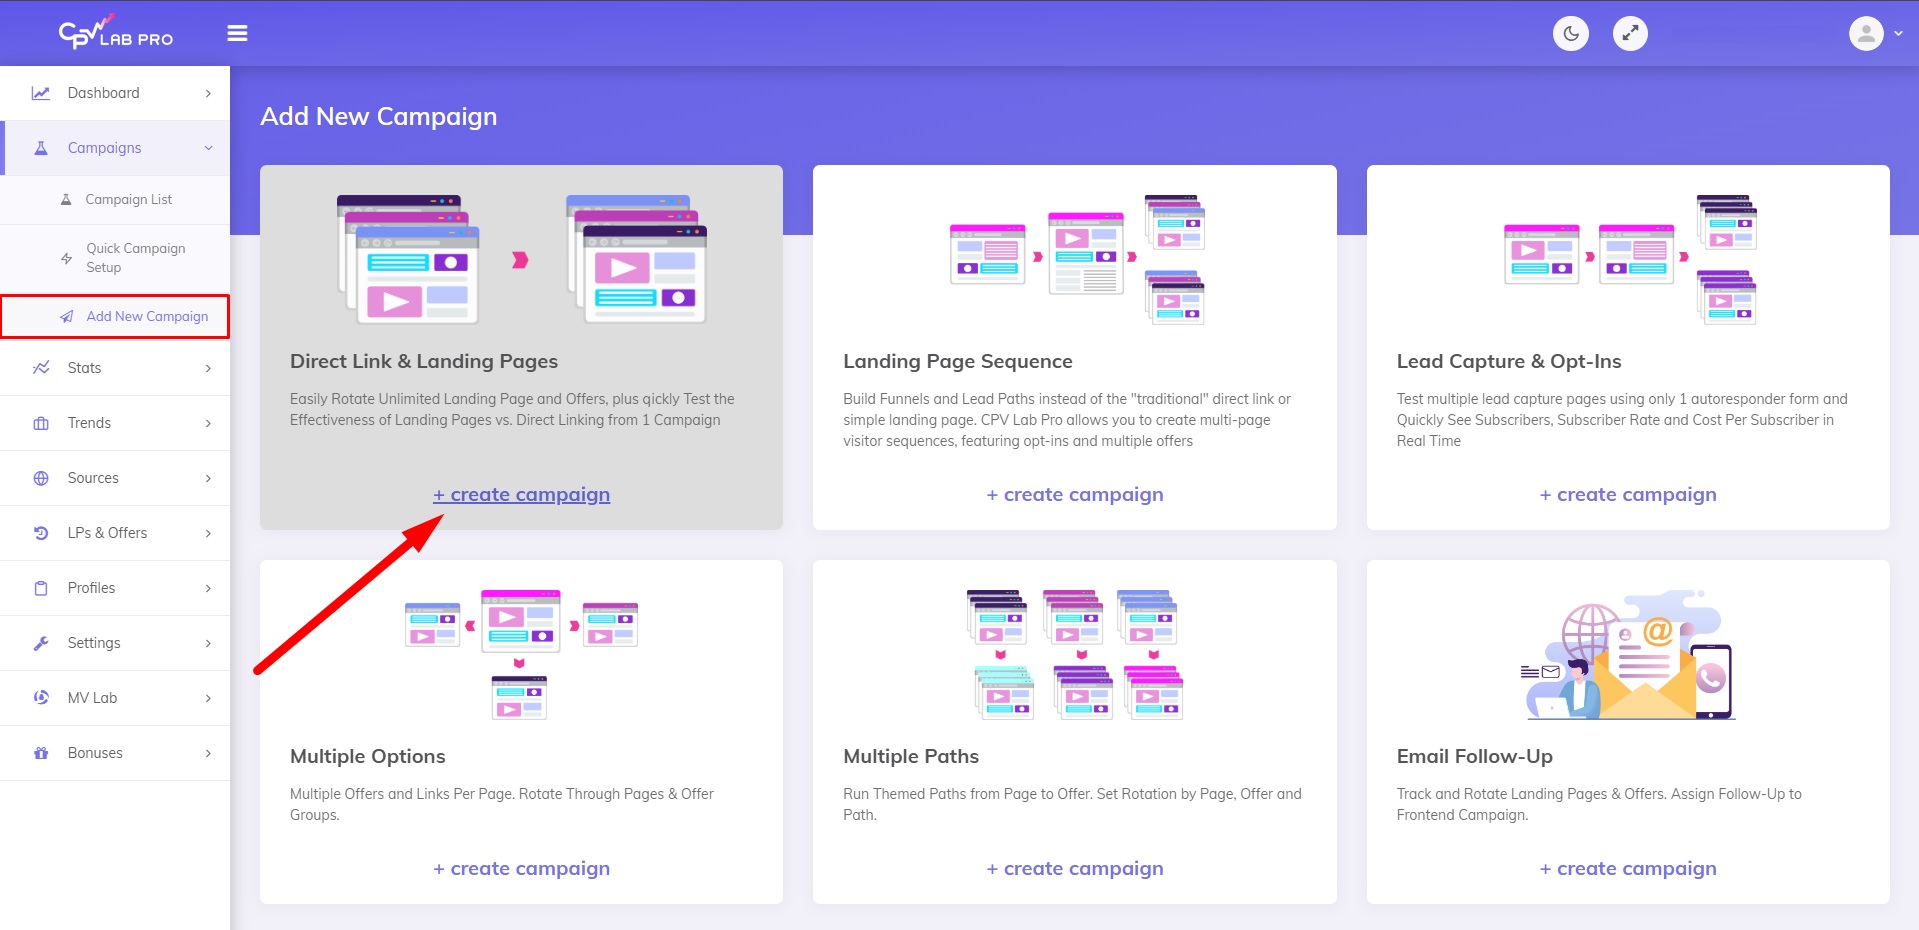
- Specify the general info for the ads tracking flow.
On the new page specify the name for the tracking campaign, data options, redirect type and campaign type. Then, select FatAds as the ‘Traffic source’.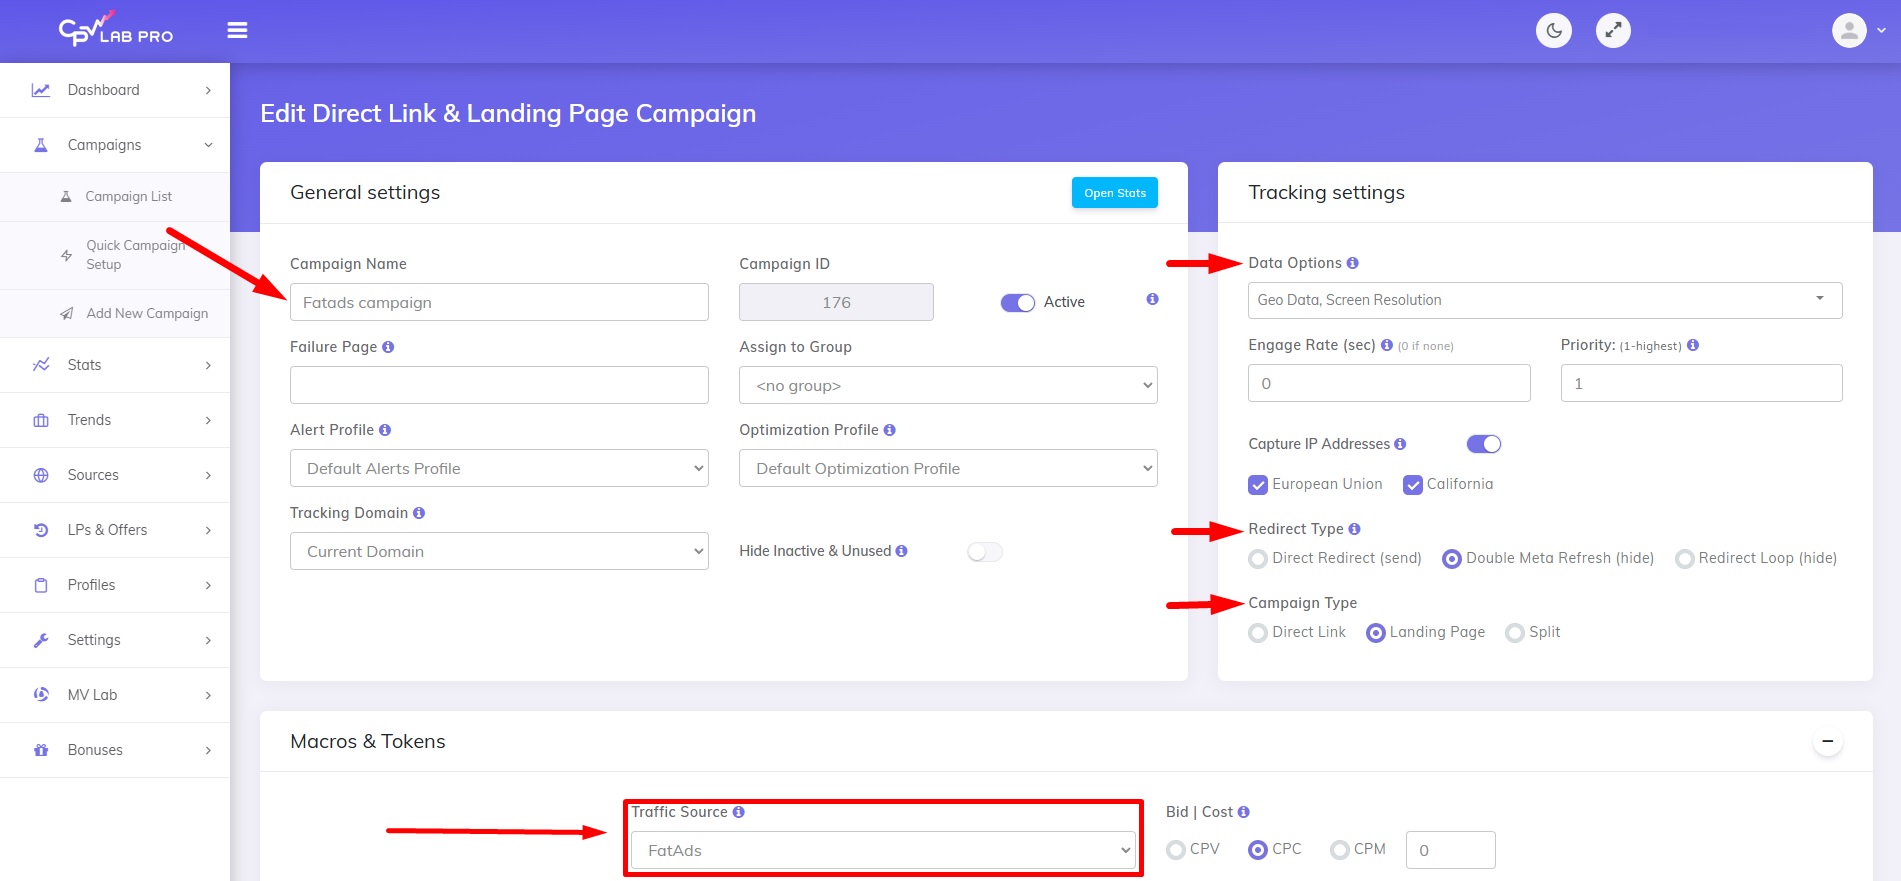
- Select the offer for tracking.
Scroll down the page a bit, then add landing pages and the offer you’ve connected. Make sure you’ve selected the needed share % for data gathering.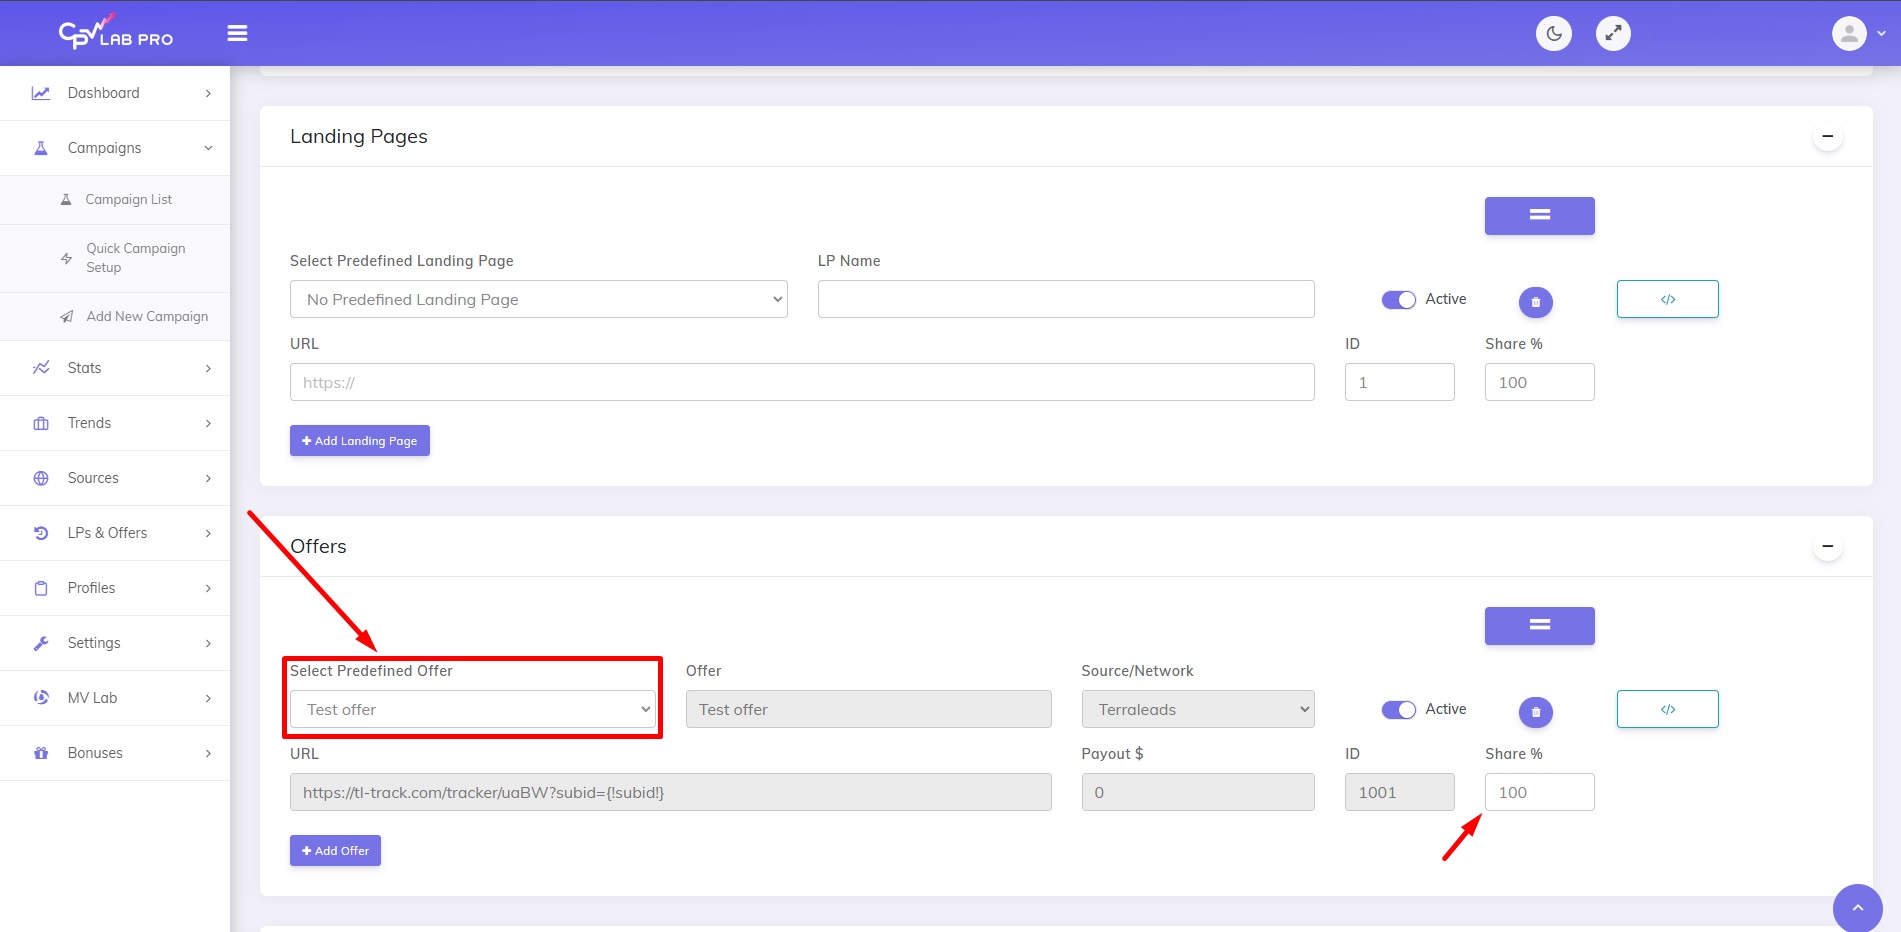
- Copy the tracking campaign URL.
Scroll down again, then copy and save the ‘Campaign URL’ field, then proceed to the page bottom and press ‘Save’ to complete setting up the campaign at CPV Lab.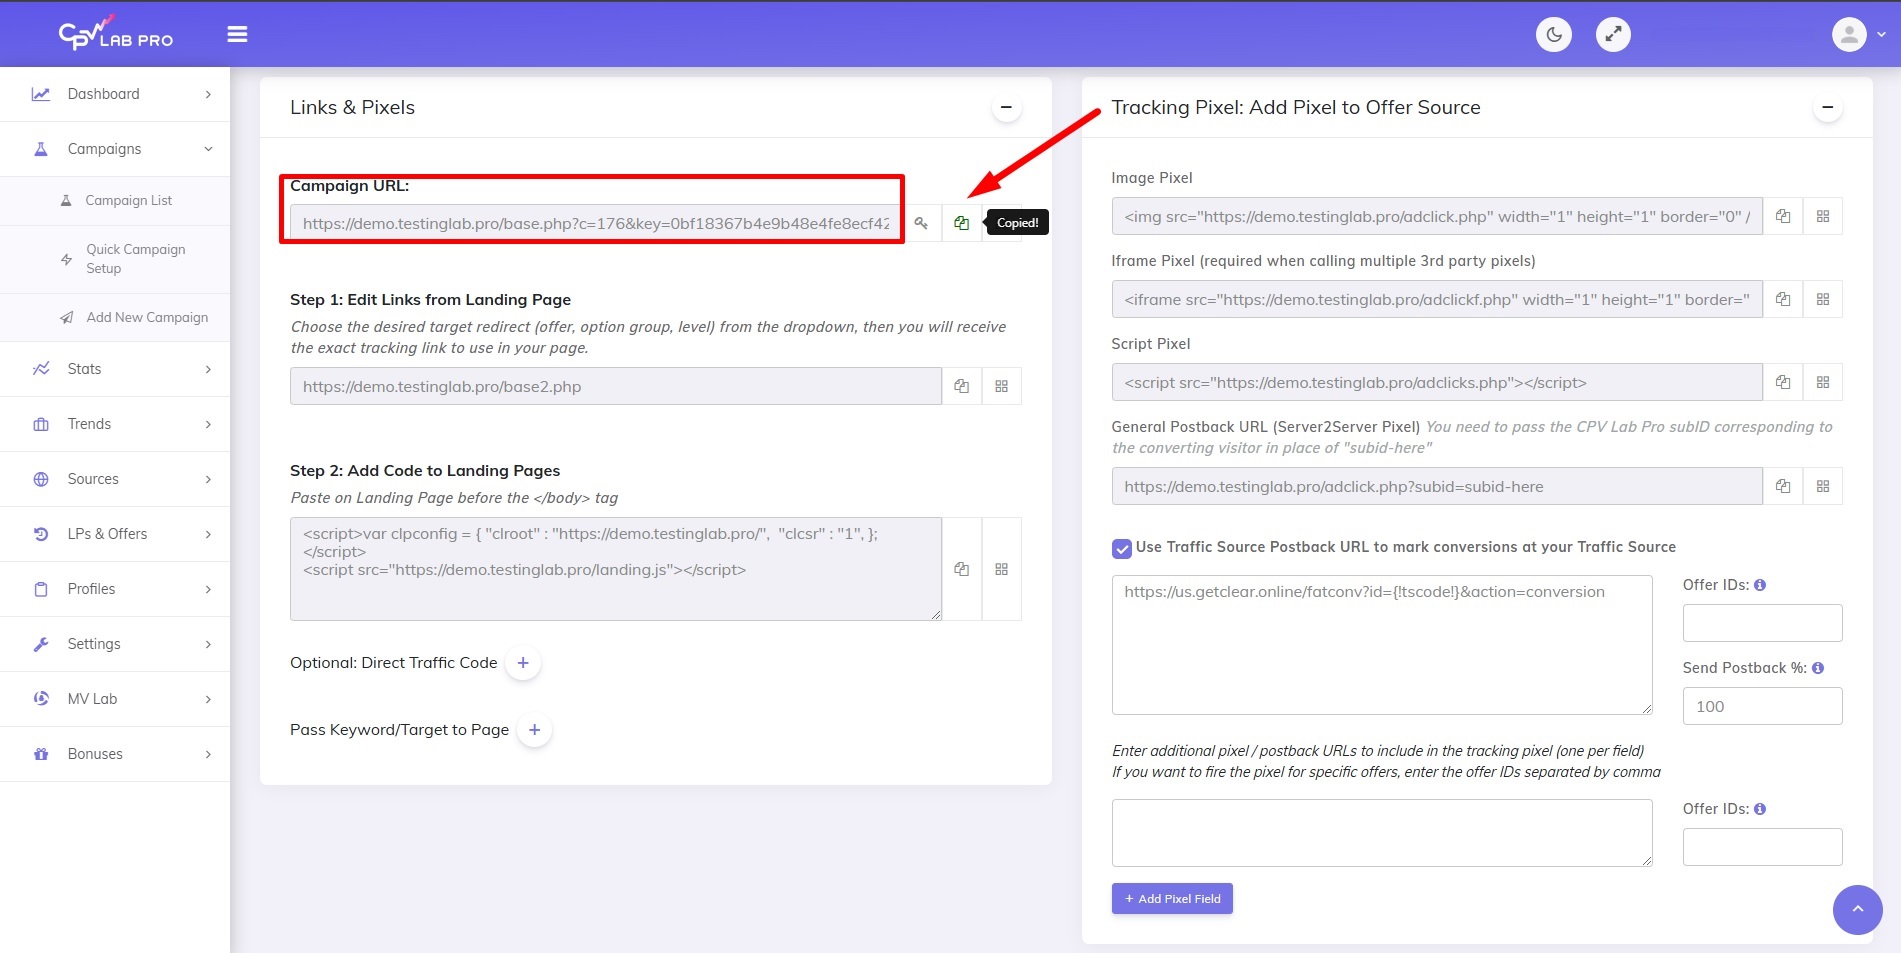
- Insert the campaign URL at FatAds.
In the campaign’s editing mode at FatAds paste the previously copied ‘Campaign URL’ in the ‘Destination URL’ field.
Conclusion
Now, you know how to set up ads tracking at CPV Lab and connect all the needed sources: from ad networks to CPA-networks and offers, along with creating a tracking campaign. With this guide, you can easily connect FatAds platform with CPV Lab and get all the benefits of ads tracking for further optimization!
Start profiting off advertising campaigns with FatAds unique self-serve ad platform!